With energy costs going up and our planet facing big challenges, finding new ways to power our homes is key. We started looking into DIY electric generators to make our own power. The idea of using renewable energy right in our own yard was too good to pass up.
We’ve spent a lot of time learning, trying, and improving our DIY electric generator. It’s been a wild ride of ups and downs, but seeing our first LED light up was amazing. Now, we’re ready to share what we’ve learned with you.
Imagine being able to power your gadgets with energy you made yourself. While we can’t make “free energy” yet, our DIY method gets you closer to being energy independent. You can make anything from small power stations to big systems for your whole house.
With places like California banning gas-powered tools, finding new energy sources is more important than ever. Our guide will show you how to make your own renewable energy. We’ll cover everything from making 200 feet of wire to setting up your magnets for the best results. You can even make your project bigger to light up a 1.5-volt bulb and more.
Key Takeaways
- DIY electric generators offer a path to sustainable, off-grid power generation
- Portable power outputs range from 80 to 2,000 watts
- Whole-home energy storage systems can store dozens of kilowatts
- 200 feet of wire is typically used in basic generator construction
- Proper magnet placement is crucial for optimal power generation
- Scaling up your project can increase power output significantly
Understanding DIY Electric Generator Fundamentals
DIY electric generators help us live more sustainably and produce our own energy. They turn mechanical energy into electricity, giving us power when we need it. Let’s look at the main ideas and parts of these generators.
Basic Principles of Electric Generation
Electric generators capture motion and turn it into electricity. They use wire coils to do this, with more coils making more power. This basic idea is the base of making DIY generators.
Components and Materials Overview
Important parts of a DIY electric generator include:
- Frame and rotating shaft
- Bearings and field windings
- Armature and stator
- Commutator and brush assembly
These parts work together to make a working generator. The materials used affect how long it lasts and how well it works. Metal is often better than plastic for these parts.
Safety Considerations and Precautions
When working with DIY electric generators, safety is key. You need to use the right insulation, grounding, and ventilation. It’s important to know how to control the magnetic field and current output. This affects both how well it works and how safe it is. Always follow safety rules and wear protective gear when making or using your generator.
“Building a DIY electric generator is a step towards energy independence, but safety should never be compromised in the pursuit of sustainable living.”
Essential Tools and Materials for Construction
Building a DIY electric generator needs careful planning. We’ve put together a list of key parts and tools. They will help you make your homemade power generator smoothly.
Required Hardware Components
The core of your DIY electric generator is its main parts. You’ll need ceramic block magnets (3/8″ x 7/8″ x 1-7/8″), a metal rod for mounting, and cardboard for the housing. Also, an LED is needed to check your output.
Wire and Electrical Components
Copper wire is key for your homemade power generator. You’ll need about 200 feet of #30 gauge wire for 300 turns around your housing. This setup should give you about 60 milliamps of current. The wire must be coated with non-conductive material, which you’ll partially sand off for conductivity.
| Component | Specification | Purpose |
|---|---|---|
| Copper Wire | #30 gauge, 200 feet | Coil winding |
| Magnets | Ceramic block, 3/8″ x 7/8″ x 1-7/8″ | Magnetic field generation |
| LED | Standard | Output testing |
Construction Tools Checklist
Get these tools ready before starting:
- Hot glue gun (for securing magnets)
- Sandpaper (for wire preparation)
- Digital Voltmeter (for output measurement)
- Drill (optional, for advanced designs)
With these materials and tools, you’re set to start your DIY electric generator project. Always remember, safety is crucial when working with electrical parts!

Building the Generator Housing
Building a strong housing for your DIY electric generator is key for off-grid power and green living. We’ll show you how to make a tough enclosure. It will keep your generator safe and work better.

The housing size depends on your magnets. For our project, we’re using magnets that are 3/8″ x 7/8″ x 1-7/8″. So, we need a housing that’s 2-1/2″ x 1-1/2″ x 3″. Here’s what you need and how to build it.
Materials List
- 0.5″ plywood for the enclosure
- 8 L-Brackets for reinforcement
- 1/4 inch and 1/2 inch machine screws
- Hardwood railing bars (cut to required length)
- 3 louvered vents for airflow
Construction Steps
- Cut the plywood to the right size
- Put the box together with L-Brackets and screws
- Add hardwood bars for extra support
- Attach louvered vents for air flow
- Make sure there’s 2-3 inches of space around the generator
A good housing protects your generator and makes it work better. By following these steps, you’re moving closer to using clean energy and living more sustainably.
| Component | Dimension/Quantity | Purpose |
|---|---|---|
| Plywood | 0.5 inch thick | Main enclosure material |
| L-Brackets | 8 | Structural reinforcement |
| Machine Screws | 1/4 inch and 1/2 inch | Secure components |
| Louvered Vents | 3 | Ensure proper airflow |
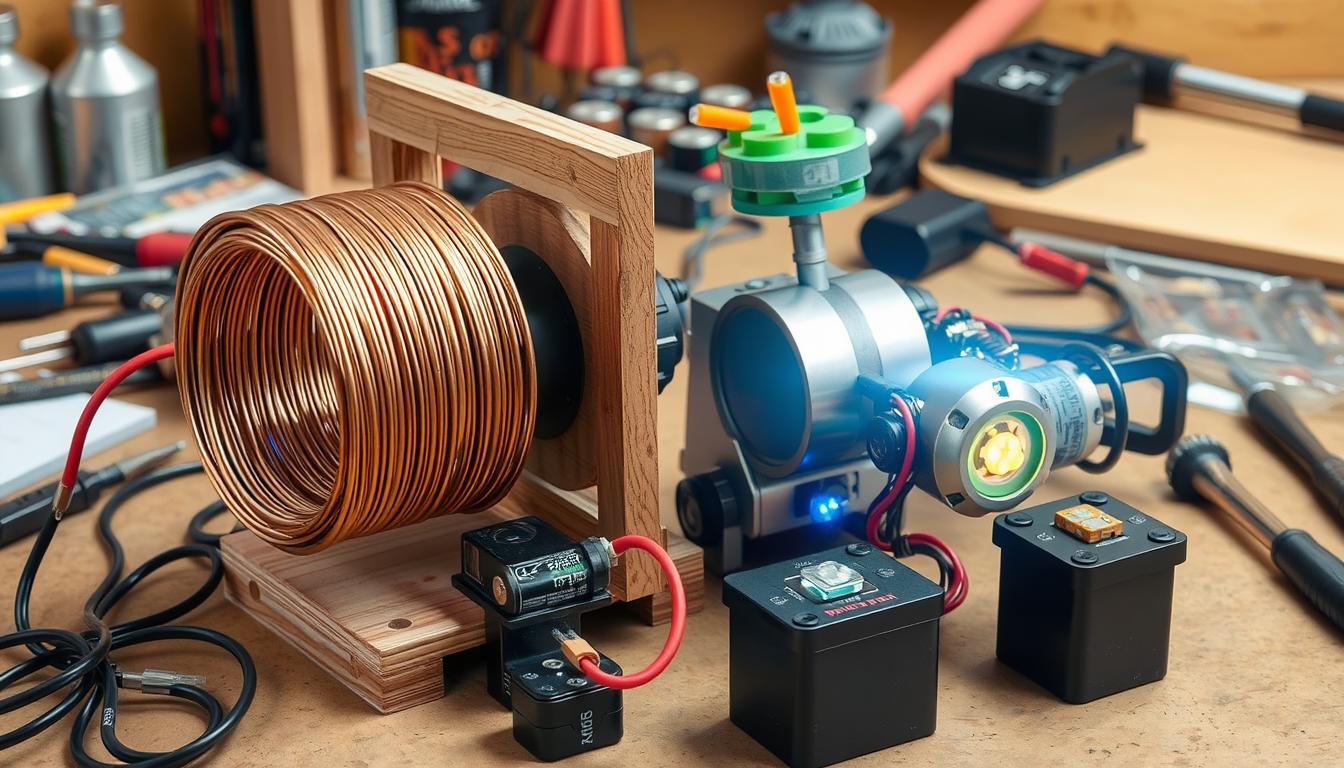
Winding the Copper Wire Coils
Winding copper wire coils is a key step in making a diy electric generator. It needs precision and patience for the best results. This ensures your homemade power generator works well.
Proper Wire Wrapping Techniques
We begin by picking the right wire gauge. For our project, we choose 42 gauge magnet wire. This thin wire fits more turns in a small space, making the generator more efficient. Wind the wire tightly around the core, aiming for 1000 wraps.
It’s important to keep the tension and direction the same while winding.

Calculating Wire Length Requirements
To figure out how much wire you need, multiply the core’s perimeter by the number of wraps. For example, an 8-inch perimeter with 1000 wraps needs about 666 feet of wire. This ensures you have enough wire for the coil.
Insulation and Connection Methods
Insulation is crucial to avoid short circuits. Use enamel-coated wire and add extra insulation between layers. When connecting the coil ends, sand off the enamel to expose bare copper for secure connections.
| Wire Gauge | Turns | Voltage Output | LED Capacity |
|---|---|---|---|
| 42 AWG | 1000 | ~4 VAC | 3 LEDs |
Winding coils for your homemade power generator is tough. But the end result is a working diy electric generator. It can light LEDs and provide a small but steady power output.
Magnet Assembly and Rod Installation
We’re now ready to build the core of our DIY electric generator. This is a key step in making a renewable energy source for self-sufficient energy. We’ll carefully place magnets and install the central rod.

First, we need a 6-inch metal rod. This rod is the axle for our generator. We put it through the housing’s center, making sure it’s straight and can rotate easily.
Next, we assemble the magnets. We use two strong magnets, placing them on either side of the rod. This setup is key for making electricity. We use hot glue or strong tape to hold the magnets to the rod, making sure they’re centered and don’t touch the sides when it rotates.
- Use a 6-inch metal rod as the generator’s axle
- Attach two strong magnets to the rod
- Secure magnets with hot glue or tape
- Ensure smooth rotation without contact with sides
After we assemble it, we test the rod’s rotation. It should move smoothly without any resistance. This smooth movement is crucial for efficient power generation in our DIY renewable energy source.
“The heart of a DIY electric generator lies in its magnet assembly. Proper installation ensures optimal energy conversion.”
Remember, the success of our self-sufficient energy project depends on this step. A well-assembled magnet and rod system is the foundation for reliable power generation. It brings us closer to energy independence.
LED Integration and Power Output Testing
Integrating LEDs and testing power output are key steps in making an effective emergency power supply or off-grid electricity system. We’ll show you how to connect LEDs, measure voltage, and fix common problems. This will help your DIY electric generator work its best.
LED Connection Methods
Connecting LEDs to your generator is easy. Just attach the generator leads to the LED. Remember, since it’s AC, polarity doesn’t matter. Spin the rod fast to test it. If the LED doesn’t light up, look for flickers and try spinning it even faster.

Testing Voltage Output
To check your generator’s output, use a voltmeter or multimeter. This is key for seeing how well your emergency power supply works. Set your meter to measure AC voltage and connect it to the generator leads. Spin the rod at different speeds to see how voltage changes.
Troubleshooting Common Issues
If you’re having trouble with your off-grid electricity setup, don’t worry. First, check all connections for loose wires or bad contacts. Make sure your copper coils are wound right and insulated well. If output is low, try adding more magnets or spinning the rod faster. Remember, the more you practice, the better you’ll get at making DIY electric generators.
- Verify all connections are secure
- Inspect coil winding and insulation
- Add more magnets for increased output
- Experiment with different rod spin speeds
By following these steps, you’ll be well on your way to making a reliable emergency power supply. Remember, patience and persistence are key when working on off-grid electricity solutions.
Motor and Drive System Setup
Setting up the motor and drive system is key to making a diy electric generator. We’ll show you how to put together a more advanced setup. This uses a geared DC motor to increase your generator’s power.
Begin by fixing a geared DC motor to a thermocol base on cardboard. This gives your generator a solid base. Then, attach a small skewer to the motor shaft. This small step greatly improves your generator’s function.

To make rotation better and possibly boost power, we’ll add a handle. Drill holes in ice cream sticks and attach them to the skewer. This DIY handle makes it easier to rotate the generator by hand.
Here are some impressive stats for our homemade power generator:
- A permanent magnet brushless motor can produce around 40 volts at nearly 700 RPM
- Our generator setup can yield nearly 36 volts and a total output of 250 watts at around 40% throttle
- The entire generator assembly weighs approximately 8kg, making it relatively lightweight for its power output
If you want to make your diy electric generator even better, think about adding a buck/boost converter. This lets you power DC loads or charge a battery. It makes your generator more versatile.
“The motor’s centrifugal clutch engages when the engine speed is increased, providing smooth power transmission in our diy electric generator setup.”
Remember, safety is always first when working on your homemade power generator. Always follow safety guidelines and seek expert advice if you’re unsure about any part of the setup.
Power Generation Optimization Techniques
Improving energy output and efficiency is crucial for sustainable living and renewable energy. Our DIY electric generator project can benefit from these techniques. This will enhance its performance and reliability.
Maximizing Energy Output
To increase power production, we can try different wire configurations. Using thicker wire or adding more wrappings boosts the generator’s capacity. Exploring various magnet strengths and arrangements also impacts energy yield.

Efficiency Improvements
Improving our generator’s efficiency involves tweaking several components. Adding a geared system increases rotation speed and power output. Optimizing the housing design for better magnetic field interaction with coils is also key.
Regular maintenance is essential for our DIY generator’s smooth operation. This includes checking connections, lubricating parts, and replacing worn components. By keeping up with maintenance, we ensure our renewable energy source remains reliable and efficient.
| Optimization Technique | Potential Improvement | Complexity |
|---|---|---|
| Thicker gauge wire | 10-15% increase in output | Low |
| Additional wire wrappings | 5-10% increase in output | Medium |
| Stronger magnets | 15-20% increase in output | Medium |
| Geared system | 20-30% increase in output | High |
| Optimized housing design | 10-15% increase in efficiency | High |
By using these optimization techniques, we can make our DIY electric generator more efficient. This supports our sustainable living goals and helps create a greener future powered by renewable energy.
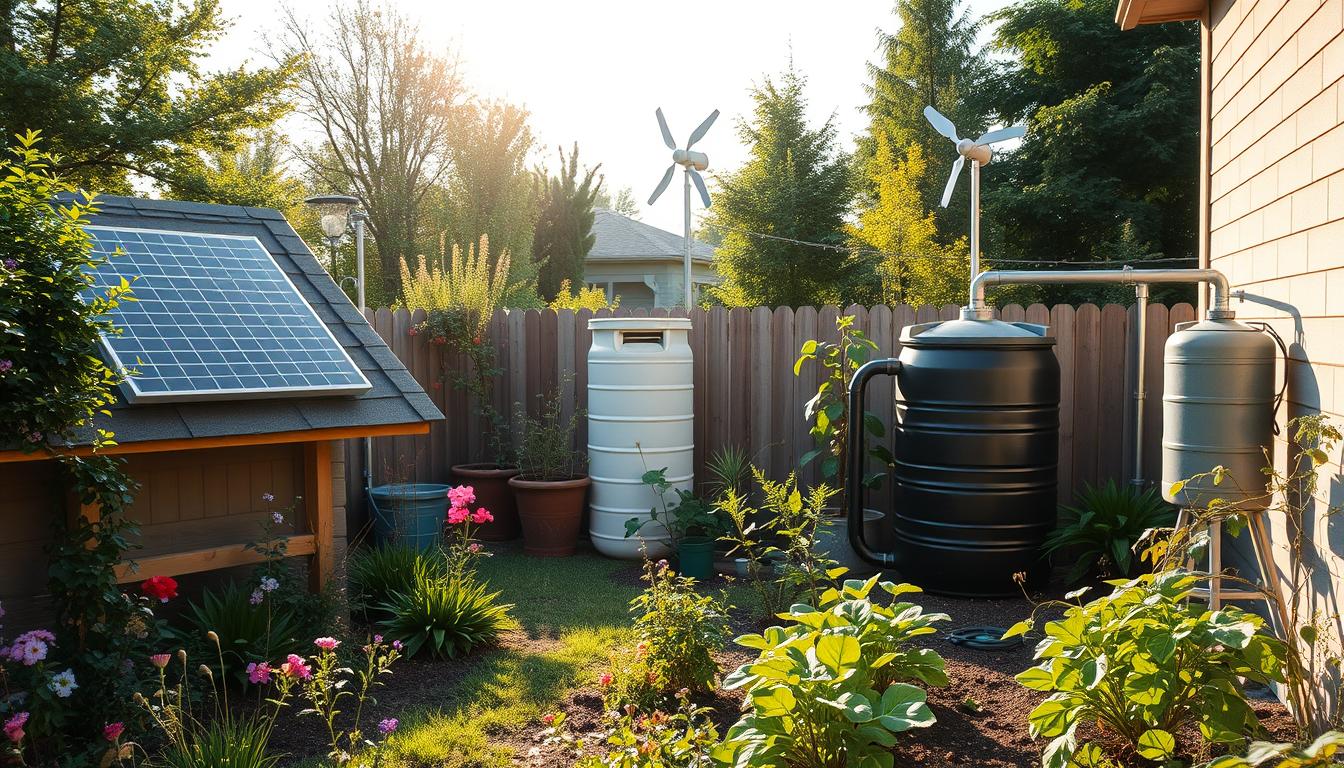
Alternative Energy Source Integration
Our DIY electric generator can be made better by adding other green energy sources. This makes our power system more flexible and dependable. Let’s see how we can make our generator work with wind, solar, and hybrid systems.
Wind Power Adaptation
Building a wind turbine can really up our generator’s power. We attach blades to the shaft to catch wind energy. This is great for places with steady winds. Small wind systems are also affordable for home use.
Solar Panel Connection Options
Adding solar panels can also boost our generator’s performance. We can link solar panels to charge a battery, which then runs the motor. This setup keeps energy flowing, even when the sun isn’t strong. You can build a basic solar generator for under $300, with a 12-volt panel, battery, and inverter.

Hybrid System Design
Mixing different green energy sources makes a strong hybrid system. This way, we use wind and solar at their best times. In places with changing weather, a hybrid system gives us steady power.
| Energy Source | Cost | Power Output | Best Use Case |
|---|---|---|---|
| Wind Turbine | $500 – $3000 | 100W – 10kW | Windy areas, rural settings |
| Solar Panels | $200 – $1000 | 50W – 400W per panel | Sunny climates, urban areas |
| Hydroelectric Project | $1000 – $5000 | Up to 100kW | Properties with flowing water |
| Hybrid System | $1500 – $8000 | Varies based on components | Areas with diverse weather patterns |
By adding these green energy sources, we make our power system better and greener. Whether it’s wind turbines, solar panels, or small hydro projects, each has its own benefits for our DIY generator.
Maintenance and Troubleshooting Guide

Keeping your DIY electric generator in good shape is crucial. It ensures you have a steady supply of self-sufficient energy. We’ve created a guide to help you with maintenance and troubleshooting for sustainable living.
Inspect your generator every year. Look at wire connections, make sure the rod moves smoothly, and check for any damage. Also, clean or replace the fuel filter, check the oil, and change the oil and air filters when needed.
Common Issues and Solutions
Here are some common problems and their possible causes:
- Engine starts, but no power output: This could be due to an overloaded generator, a faulty circuit breaker, or a bad Automatic Voltage Regulator (AVR).
- Difficulty starting: Stale fuel, a dirty air filter, or spark plug issues might be the cause.
- Engine starts but stalls quickly: Low oil level, a dirty fuel filter, or carburetor problems could be the reason.
Watch the color of smoke from your generator. Black smoke means fuel combustion issues. Blue smoke suggests oil consumption problems. White smoke indicates coolant is leaking where it shouldn’t.
Safety First
Always disconnect your generator from the electrical grid when working on it. This prevents shock. Make sure you have good ventilation to avoid toxic fumes. Wear gloves, goggles, and the right clothes for protection.
| Essential Repair Equipment | Maintenance Task | Frequency |
|---|---|---|
| Wrenches, screwdrivers, multimeter | Check wire connections | Monthly |
| Gloves, goggles | Inspect housing | Quarterly |
| Oil filter wrench | Change oil and filters | Annually or as needed |
By following this guide, you’ll keep your DIY electric generator running smoothly. This ensures a reliable source of self-sufficient energy for your sustainable living.
| Unlock Unlimited Energy with Edison’s ‘Lost Invention’ As you’ve just learned, building a DIY electric generator can significantly reduce your reliance on traditional power sources. But what if there was a way to access unlimited, on-demand energy—without the hassle of building a generator yourself or dealing with fuel costs? Edison’s “Lost Invention” is said to hold the secret to unlocking this kind of boundless energy, providing a potential game-changer for anyone looking to achieve true energy independence. Want to discover how you can harness this breakthrough technology for your home or business? Click here to learn more about Edison’s ‘Lost Invention’ and how it could revolutionize the way you power your life! |
Conclusion
Building a DIY electric generator is a hands-on way to learn about renewable energy and sustainable living. We’ve seen how power generation has evolved from its early days to today. Pioneers like Edison and Faraday started it all, and now generators are key to our power systems.
Our DIY project might not be as efficient as Edison’s, but it teaches us about electromagnetic generation. We’ve discovered different types of generators, from simple dynamos to complex alternators. By making our own, we’ve learned about the challenges and chances in sustainable energy.
As we finish, remember that “free energy” is still a dream. But our DIY project shows us the power of renewable energy. It encourages us to find new ways to live sustainably, especially with energy costs rising. Let’s keep exploring and learning safely, always following the rules, in the world of DIY power generation.
FAQ
What is a DIY electric generator?
A DIY electric generator is a homemade device that turns mechanical energy into electrical energy. It has magnets, copper wire, a metal rod, and an LED. We make these to show how electricity is made and to teach about renewable energy.
Is it possible to create truly free energy with a DIY generator?
No, you can’t make truly free energy. These projects are called “free energy devices,” but they just change one energy type to another. The term “free energy” is not scientifically correct.
What materials do I need to build a basic DIY electric generator?
You’ll need cardboard, copper wire, ceramic block magnets, a metal rod, an LED, and string. Also, a hot glue gun, sandpaper, and maybe a drill are needed.
How does the size of the generator housing affect its performance?
The housing size must fit the magnets you use. For example, 3/8″ x 7/8″ x 1-7/8″ magnets need a 2-1/2″ x 1-1/2″ x 3″ housing. The right size ensures the magnets and wire coils work well together.
How many wire wrappings are needed for the generator to work?
Aim for at least 300 copper wire wrappings around the housing’s center. More wrappings mean higher voltage.
How can I increase the power output of my DIY generator?
To boost power, add more wire wrappings, use thicker wire, or try stronger magnets. A geared system to speed up rotation also helps. Better magnetic field interaction with the coils is key.
Can this DIY generator be adapted for wind power?
Yes, it can. Add blades to the rotating shaft to make a small wind turbine.
Is it possible to integrate solar panels with this DIY generator?
Absolutely. Connect solar panels to charge a battery, then power the motor for steady energy. This mix of renewable sources boosts reliability.
What safety precautions should I take when building and using a DIY electric generator?
Safety is critical with electrical parts. Use insulated tools, avoid exposed wires, and never use it in wet conditions. Always follow electrical safety rules and seek help if unsure.
How do I maintain my DIY electric generator?
Regular checks include wire connections, rod rotation, and housing damage. For motor systems, lubricate and align parts. If the LED doesn’t light, check connections, try reversing rotation, and look for wire breaks.
Can this DIY generator be used as an emergency power supply?
While it can make some electricity, it’s not enough for big emergency needs. But, the knowledge gained can help build more powerful systems for emergencies.
Is this DIY electric generator project suitable for beginners?
Yes, it’s great for beginners learning about electricity. It’s designed to teach renewable energy and sustainable living. But, adult supervision is wise for younger makers.
Source Links
- How to Get Free Electricity at Home – Home Energy Storage Buyer’s Guide
- How to Make a Simple Electric Generator: 10 Steps (with Pictures)
- How to Build an Electric Generator
- AC Electrical Generators
- How Does A Generator Work? | Learn How Electricity Is Generated
- Electric Generator Powering LEDs
- How to Build a Generator: 8 Steps (with Pictures) – wikiHow
- DIY Electric Generator, how it works
- How to Make : Simple Electric Generator
- A Guide to Building a DIY Generator Enclosure
- Build a Magnet Generator with 42 Gauge Wire
- The Creative Science Centre – by Dr Jonathan P. Hare
- My Improvised DC Generator Build
- How to Build a Magnetic Generator
- Electric Generators: The Ultimate Guide
- [Hot Item] 8kv EMC Surge Generator for LED Driver Testing
- Self-sustained electricity generator driven by the compatible integration of ambient moisture adsorption and evaporation – Nature Communications
- DIY Miniature Gasoline Generator
- Induction Generator
- How to Make a Wood fired Electric Generator
- Cheapest Way to Make Your Own Electricity – EMS Power Machines
- Optimization of Power Generation Grids: A Case of Study in Eastern Mexico
- Build a Solar Power Generator for Under $300
- Planning for Home Renewable Energy Systems
- Empowering Self-Reliance: Building and Integrating Your Own Electric Power Generator
- How to Fix a Power Generator – PC Inc.
- Power Generator Troubleshooting: Common Issues and DIY Solutions – Northside Power
- Designing the Generator
- Electric generator
- A Study on Self-Sustaining Electric Generator
Affiliate Disclosure: This article contains affiliate links, meaning I may earn a commission if you click through and make a purchase, at no extra cost to you.